Understanding Object-Oriented Programming in JavaScript
When people first hear Object-Oriented Programming (OOP), it sounds like some elite programming philosophy invented to confuse beginners, but the reality is it's just a way to organise code so it resembles real-world things.
Instead of writing random functions everywhere, OOP helps you group related data and behaviour together. Think of it as giving your code a little structure so it doesn't turn into chaos.
Let's break it down step by step.
What Object-Oriented Programming (OOP) menas
Object-Oriented Programming is a programming style where you structure your code around objects.
An object represents something with:
Properties (data about the object)
Methods (actions the object can perform)
For example, a Car object might have:
Properties:
color
brand
speed
Methods:
start()
stop()
accelerate()
So instead of thinking in isolated functions, OOP helps us think in terms of things and their behaviours.
A Simple Real-World Analogy
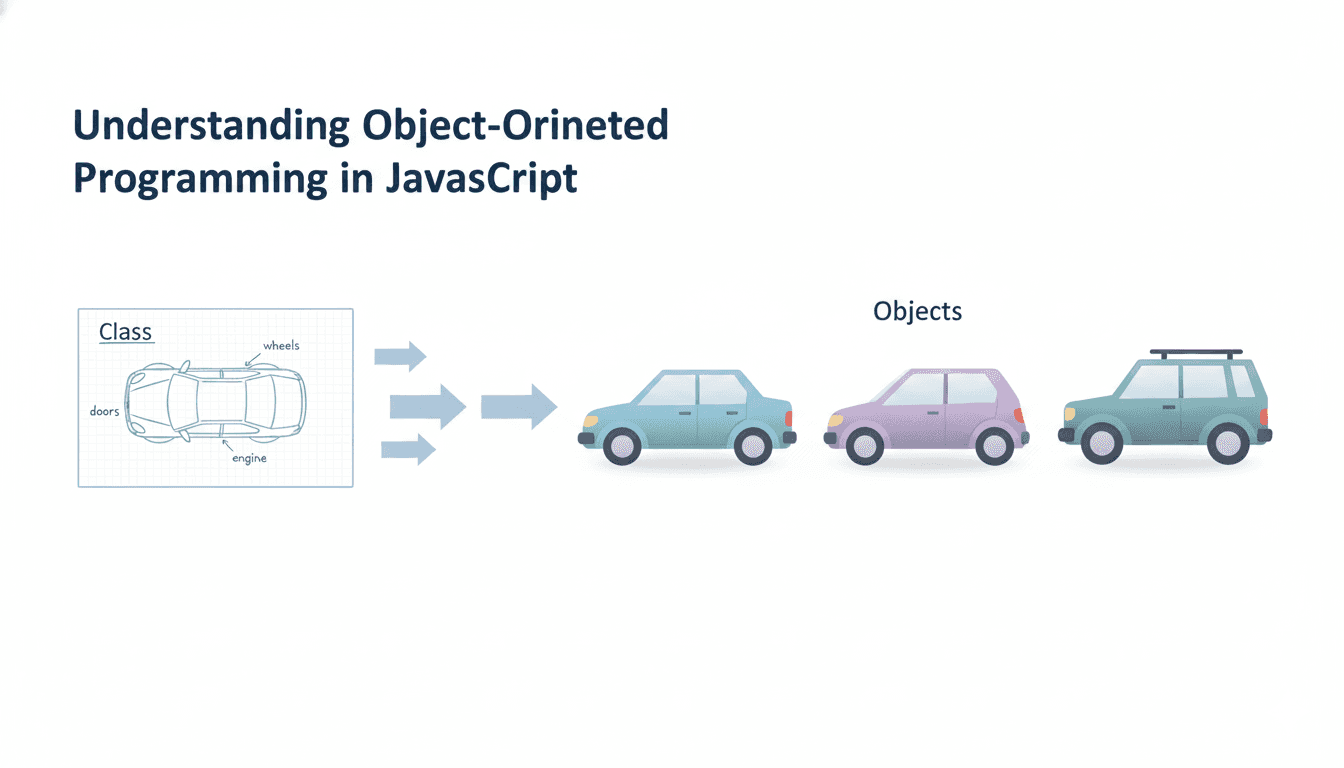
Imagine a car manufacturing company. Before producing cars, engineer create a blueprint.
The blueprint describes:
color
engine type
number of doors
features
But the blueprint itself is not a car.
It's just a template.
Using that blueprint, the company can produce many cars.
Each car is a separate object, but all follow the same design.
Programming works the same way.
In JavaScript:
Blueprint -> Class
Actual cars -> Objects
What is a Class in JavaScript?
A class is basically a blueprint for creating objects.
It defines:
what properties will an object have
what actions they can perform
Here is a simple class example.
class Car {
    brand = "Toyota";
}
This defines a blueprint called Car. But notice something important:
This code does not create a car yet.
It only defines how cars should look.
Creating Objects from a Class
To create an actual object, we use the new keyword.
class Car {
    brand = "Toyota";
}
const car1 = new Car();
Now car1 is an object created from the Car class.
You can access its properties like this:
console.log(car1.brand);
Output:
Toyota
You can create multiple objects from the same class.
const car1 = new Car();
const car2 = new Car();
const car3 = new Car();
All of them follow the same blueprint.
That's code reuseability, which is one of the biggest benefits of OOP.
The Constructor Method
Often, we want each object to have different values.
For example:
Car 1 -> Toyota
Car 2 -> BMW
Car 3 -> Tesla
This is where the constructor comes in.
A constructor is a special method that runs when a new object is created.
Example:
class Car {
    constructor(brand, color) {
        this.brand = brand;
        this.color = color;
    }
}
Now we can create different cars.
const car1 = new Car("Toyota", "Red");
const car2 = new Car("BMW", "Black");

console.log(car1.brand); //Toyota
console.log(car2.brand); //BMW
The constructor helps initialise the object with specific data.
Methods Inside a Class
Classes can also contain methods.
Methods are simply functions that belong to the object.
Example:
class Car {
  constructor(brand) {
    this.brand = brand;
  }

  start() {
    console.log(this.brand + " is starting...");
  }
}
Now create an object.
const car1 = new Car("Tesla");

car1.start();
Output:
Tesla is starting...
The method start() belongs to every object created from the Car class.
Basic Idea of Encapsulation
Encapsulation sounds fancy, but the idea is simple.
It means keeping related data and behaviour together inside a class. Instead of writing scattered variables and functions everywhere, we group them.
Example without OOP:
let name = "Rahul";
let age = 20;

function printDetails() {
  console.log(name, age);
}
Now imagine doing this for hundreds of students. That would be a mess.
Using a class keeps everything organised.
class Student {
  constructor(name, age) {
    this.name = name;
    this.age = age;
  }

  printDetails() {
    console.log(this.name + " is " + this.age + " years old.");
  }
}
Now the data and behaviour belong together. That's encapsulation in a beginner-friendly sense.
Assignment: Create Your Own Student Class
Create a class called Student.
Requirements:
Properties:
name
age
Method:
- printDetails()
Example solution:
class Student {
  constructor(name, age) {
    this.name = name;
    this.age = age;
  }

  printDetails() {
    console.log(this.name + " is " + this.age + " years old.");
  }
}
Create multiple students:
const student1 = new Student("Rahul", 20);
const student2 = new Student("Aisha", 22);

student1.printDetails();
student2.printDetails();
Output:
Rahul is 20 years old.
Aisha is 22 years old.
Conclusion
Object-Oriented Programming is simply a way to model real-world things in code.
Key ideas to remember:
Class -> blueprint
Object -> instance created from the blueprint
Constructor -> initialises object data
Methods -> actions the object can perform
Encapsulation -> grouping data and behaviour together
You don't need to memorise everything right now.
Just remember the big idea:
OOP helps you write code that is easier to organise, reuse, and maintain.
And trust me, once your projects grow beyond a few files, you'll appreciate that structure.
Want More?
Blog: https://blogs.kanishk.codes/
Twitter: https://x.com/kanishk_fr/
LinkedIn: https://linkedin.com/in/kanishk-chandna/
Instagram: https://instagram.com/kanishk__fr/